Coconut Coir is the new superstar of gardening, and there are plenty of reasons why. From being highly absorbent to being sufficiently aerated, coco coir is not only easy to use but also good for the environment. Moreover, hydroponic gardeners are gravitating more and more towards coconut coir because of its remarkable properties.
The question is, what makes coconut coir so great? And what else there is to know about coconut coir?
That is exactly what you'll find in this guide, and in this order:
- What is Coco Coir
- How is Coconut Coir Produced
- Components of Coconut Coir
- Coconut Coir or Peat Moss: What to Choose?
- How to Determine Nutrients for Coconut Coir?
- Pros and Cons of Using Coconut Coir
- Dos and Don'ts of Using Coconut Coir
- Why Choose Coconut Coir for Hydroponics?
- Testing Coir For Hydroponics Use
- How to Make a Coco Coir Brick Usable?
Let us now dive in and learn all the great things about our new gardening partner!
What is Coco Coir?
In simple words, coco coir is a natural fiber product that is obtained from the husks of ripe and unripe coconuts. It has taken over the gardening world because of its numerous benefits. Some of which include high water absorbency, increased aeration, and better drainage. It is also an excellent choice for seed starting, encouraging plant growth, and supporting root structures in hydroponic systems.
 Not only that, it has been becoming famous among various kinds of people associated with gardening. Whether it is container gardeners, homeowners dabbling in gardening, commercial nurseries, or hydroponic pros, coco coir is becoming the go-to growing medium for many people.
How is coconut coir produced?
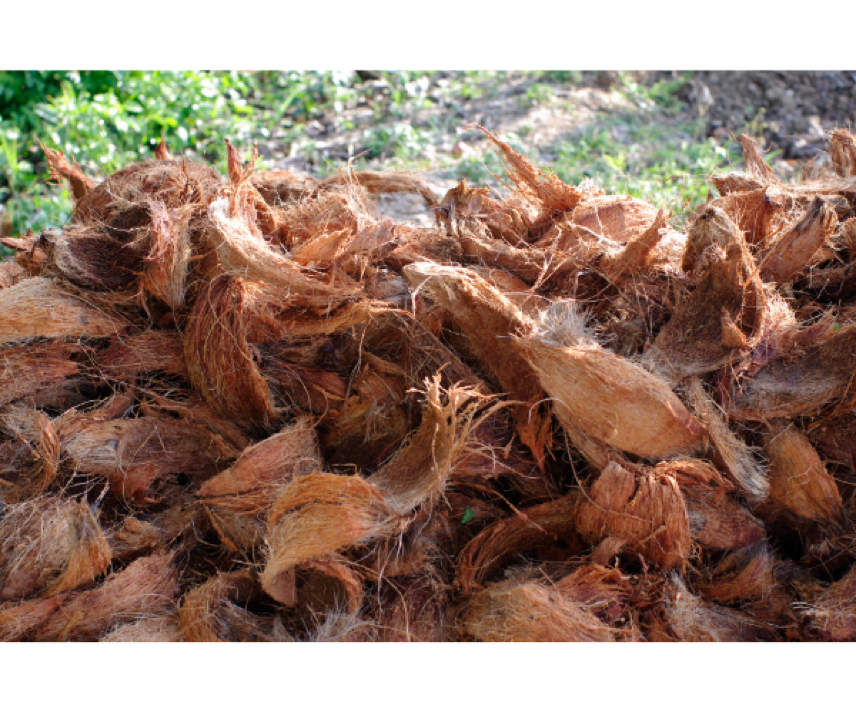
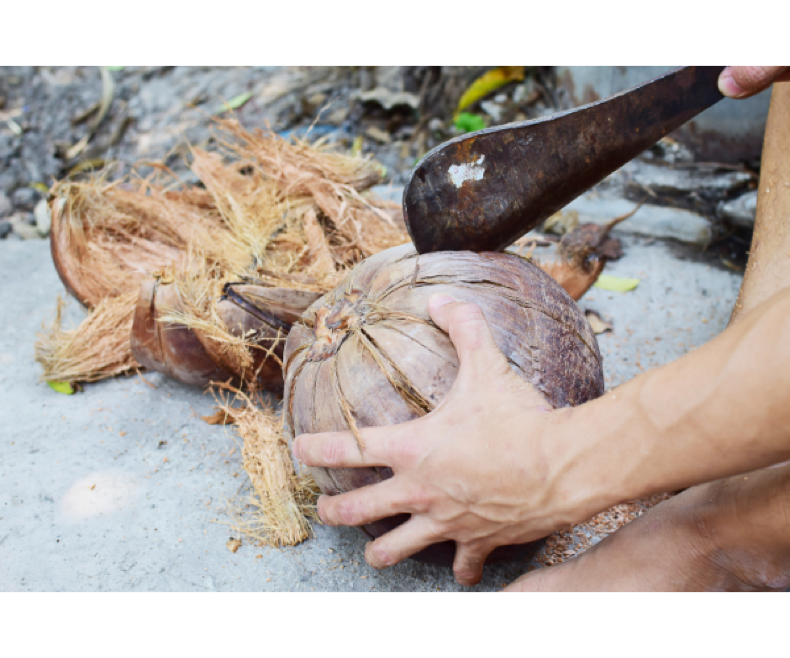
The process of coconut coir production begins by soaking the coconut husks in freshwater or saltwater. Since these husks are pretty hard, they need to be soaked to soften. If the husks are soaked in tidal waters, the salt is absorbed in the husks, which is flushed out later during the manufacturing process.
It is the by-product of the coconut harvesting process. These processes are conducted at a mass scale in Sri Lanka and India, and the production of coconut coir from this waste product helps reduce the amount of waste. Before coconut coir became popular, everything inedible from husk to the inner shell was discarded without any consideration.
Once the husks are softened, the coir is removed and laid out to dry for an extended period. Often, this drying process lasts a year, depending upon the thickness of the coir and the local weather conditions. Ideally, the longer the coir is left out to dry, the higher the quality of the final product is.
Finally, the coir is compiled into bales and bricks, making them fit for transportation. Sometimes the coir is sterilized before packaging, but sterilization kills off beneficial bacteria too, which is why not all manufacturers do it.
Components of Coconut Coir
There are three components of coconut coir that are used for gardening purposes. They are coconut fiber, coco chips, and coco peat.
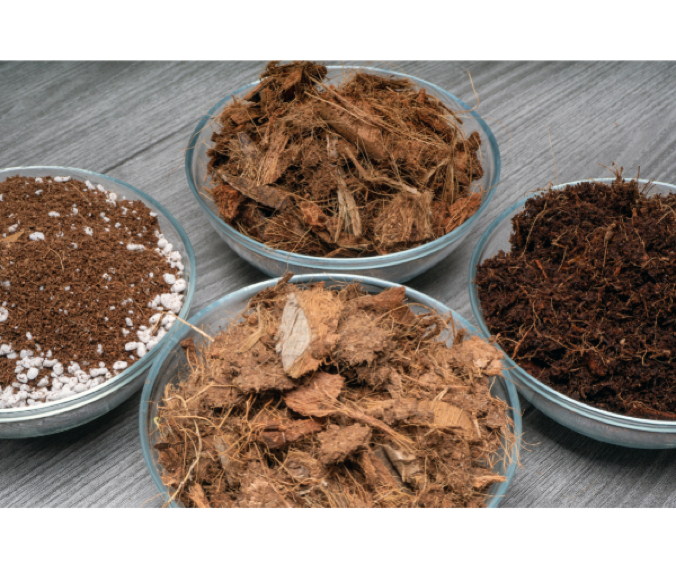
An accurate balance of these three components in your coconut coir makes it an excellent growing medium. Moreover, the ratio of these three components in your coconut coir will determine whether it is fit for your specific needs or not. The percentage of these components determines the structure of your growing medium as well as its chemical makeup. They all have their unique benefits, and in combination, they make the coconut coir what it is.
Let us take a look at the three components.
Coco Coir Fiber
The coco fiber in your coir is responsible for adding air pockets. It helps keep the oxygen flowing from the top to the roots because it lacks absorption. However, these fibers are made of cellulose, which means that if you don't add them to your coir on time, they can break down quickly and collapse the air pockets.
Coco Chips
Coco chips have a dual purpose. They absorb and retain water and create air pockets as well. They are similar to clay pellets in their function, but since they are made of organic material, they degrade fairly easily over time.
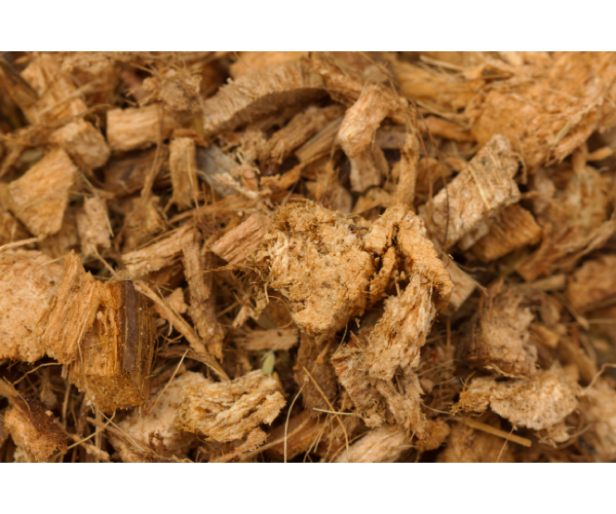
They provide a mix of functions between the fiber and the pith. In size, they are similar to coconut fiber, and depending on your goals; they can increase air pockets or improve water retention. Coco chips have the most air-to-water ratio out of the three coconut coir components.
Coco Pith/ Coco Peat
Coco pith/ coco peat is spongy and looks like loose tea leaves. It performs the function of water retention and can absorb high amounts of water. Apart from its sponginess, its wood-like nature means that it breaks down slowly. However, it doesn't have much capacity to hold air because of its small and fine particles.
Moreover, a well-aged coco pith holds good amounts of sodium and potassium. Which is why, when you're out buying coco pith, make sure that it has been aged for at least four months. Since aged pith already has enough sodium and potassium, the fertilizer fulfills the need for calcium.
Coconut Coir or Peat Moss: What to Choose?
Using coconut coir has many advantages over peat moss. First and foremost, peat moss is not suitable at all for hydroponics. As a result, coco coir has been getting famous as a great medium for hydroponic gardening(more on that in a bit).
Secondly, coconut coir comes from a renewable source, i.e., the coconut crop, since it grows annually. This makes it sustainable and environment-friendly. Before coco coir became a popular growing medium, most of the waste material from coconuts went to landfills. Using coconut coir for gardening and hydroponic purposes prevents it from going to landfills, which take centuries to break down.

In comparison, choosing peat moss is not great for the environment. Peat moss is acquired from peat bogs. These are wet areas of land where various types of moss grow. These structures are important carbon stores and are mostly referred to as carbon sinks. Peat bogs are destroyed to acquire peat moss, and they take an incredibly long time to form again, making peat moss a non-renewable resource. It is also bad for the environment because bogs release huge amounts of carbon into the atmosphere when they are destroyed, further contributing to the greenhouse effect.
Lastly, when it comes to pH levels, coco coir takes one up on the peat moss as well. Coconut coir is mostly neutral, providing a hospitable environment to most plants, making the nutrient and soil amendment easier. Not only that, most fruits and vegetables prefer more alkaline soil. When you garden using coco coir, you don't need to amend pH using limestone. On the other hand, peat moss usually sold in garden centers is slightly acidic. Canadian sphagnum peat moss is the only type with low pH of 3.0 to 4.5.
Now that you know why coco coir is better than peat moss, let us learn how you can add missing nutrients to your coco coir.
How to Determine Nutrients for Coconut Coir?
Once you decide to go with coco coir instead of peat moss, you should know the nutritional specifications of coir so that you can make adjustments wherever necessary. Coir naturally contains the following nutrients:
- Potassium
- Manganese
- Copper
- Iron
- Zinc
Coconut coir is naturally rich in potassium. This means that when you choose a fertilizer, go with a product that has low potassium content. Other nutrients in coir are negligible, but they are still beneficial. When it comes to determining the nutrients your coir medium needs, you may feel confused or overwhelmed. Ideally speaking, you want a product that is not much of a hassle and is comprehensive in nature. For this reason, Humboldts Secret's Starter Kit is a holistic solution. It is suitable for all growth mediums and methods, including coconut coir and hydroponics.
Secondly, as we already mentioned, you might need to put emphasis on calcium when growing in coco coir. Many experienced hydroponic gardeners claim that your everyday hydroponic nutrients are enough when working with coir if they have sufficient calcium. Humboldt's Secret CalMag & Iron is a no-nonsense solution for that problem. It is a perfectly balanced mix of calcium, magnesium, and iron, designed specifically to target such deficiencies.
When it comes to pH, coir is neutral. Therefore, it is best not to use it as a medium for plants that prefer acidic soil. Examples include blueberries and flowering Azaleas. For such plants, it is better to achieve soil amendment using peat moss. Whichever nutrient solution you choose for your coir, make sure that it maintains a neutral pH of about 6.0 to efficiently uptake all the available nutrients.
Pros and cons of using coconut coir
Just like everything else, coconut coir has some pros and some cons. Excellent water retention is undoubtedly its scoring point, as it is known to absorb water up to ten times its weight while keeping air pockets for ample oxygen movement. Let us now take a detailed look at coconut coir's pros and cons.
Pros
- It doesn't need to be replaced often because it breaks down slowly compared to other growing media out there.
- It maintains a well-balanced combination of growing media features such as water.
- It can be shipped economically and transported easily because it can be compressed down to about one-fifth of its size.
- It has a fairly neutral pH (pH range: 5.2-6.8), which means that you don't have to worry much about its impacts on nutrients in the soil.
- It has better retention, aeration, and drainage, allowing the roots to grow properly and providing lots of air pockets for oxygen flow.
- It has natural lignins that encourage the growth of beneficial bacteria in the root zone.
- It has anti-fungal properties that slow down fungal growth and damping off seedlings.
- It also contains essential nutrients such as potassium, iron, copper, zinc, and manganese.
- It is rich in bio-stimulants and hormones that promote root health and plant growth.
- It is a renewable, available, and environment-friendly growing media that reduces the waste from coconut processing and prevents it from going to landfills.
- It is highly hydrophilic and easy to rewet quickly.
- It is generally available in compressed dried bricks format, making it easy to store, carry, and use.
Cons
- In the overall sense, coconut coir doesn't provide a lot of nutrients like potassium, nitrogen, or phosphorus to the garden soil. Therefore, you'll need to add fertilizers to the potting mix to ensure healthy growth and provide essential nutrition.
- Coir fibers carry a net negative charge, leading to High Cation Exchange Capacity(CEC). Even though it is generally beneficial for the overall potting soil environment, it can sometimes hold up calcium, iron, and magnesium and make them unavailable for the potted plants.
- During the processing, coconut fibers from ripe coconuts are either washed in freshwater or saltwater. Washing with salt water can lead to high salt content. If you are buying coconut coir from a quality manufacturer, you do not have to worry about it because they usually wash out the final product with fresh water at a later stage to get rid of the salt content from the coconut fibers.
- Coco coir has high porosity. It is a great thing for aeration, drainage, and water passage. However, it also leads to weaker soil structure creating difficulty for plants to stay upright in contrast to other growing media. You have to use stakes or support plants using different methods to counter this.
- Low-quality coco coir usually undergoes chemical treatment before packaging to prevent bacterial growth. Therefore, you will need to soak and rinse your coir thoroughly before using it in the potting soil to remove such chemicals.
Dos and don'ts of using coconut coir
Dos
- Soak compressed coconut coir bricks for at least fifteen minutes before using them for potting mix or gardening.
- Before laying potting soil, use a layer of pebbles at the bottom to increase drainage. It applies to all types of container gardening.
- If you intend to use coir in potting soil or hydroponic gardening, make sure to check if it has ample nutrients.
- When soaking the bricks in a container, make sure that it is large enough to allow for expansion.
- For soil amendment reasons, use up to 40% coir.
Don'ts
- If you find some bricks not absorbing water readily, do not use them.
- Do not discard unused coir. You can keep it for later use and store it in an airtight container.
- Dividing or breaking dry bricks can hurt you.
Why Choose Coconut Coir for Hydroponics?
Coconut coir provides excellent ecological benefits because of its better water and air holding capacity. In contrast to other mediums, these advantages of coco coir make it an ideal choice for hydroponic gardening.
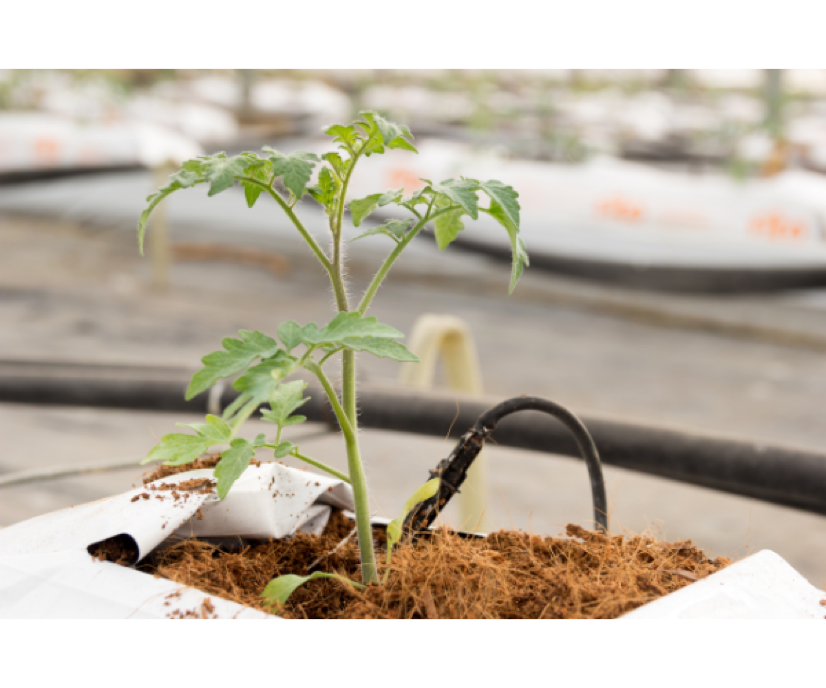
Coconut coir can absorb significant amounts of water, as much as nine times its weight, making it a no-nonsense hydroponic gardening medium. Moreover, coir provides better support to roots and better aeration for the free movement of oxygen and nutrients.
Lastly, coir is a great deterrent against fungal growth. It has natural anti-fungal properties that protect plant roots from a number of fungal root infections, such as phytophthora and pythium. These qualities make coco coir really popular among hydroponic gardeners.
How to Choose the Best Coconut Coir for Hydroponic Gardening?
Coco coir is best suited for people who are into hydroponics. Transitioning from garden soil to coir is really easy and barely noticeable. This makes hydroponic gardening with coir really simple.
Choosing the Right Type
Firstly, choose the right type of coco coir for your needs. Coconut coir created specifically for hydroponics use doesn't contain potassium or sodium so that you can control and add hydroponic nutrients as you see fit.
Moreover, coir generally comes packaged for ornamental, gardening, and hydroponic use.
Even though the ornamental type is inexpensive, it is not well suited for hydroponics or food production because of higher salt levels.
Choosing the Right Coco Fiber
When choosing coir for hydroponics, make sure to understand the difference between white and brown coir fibers.
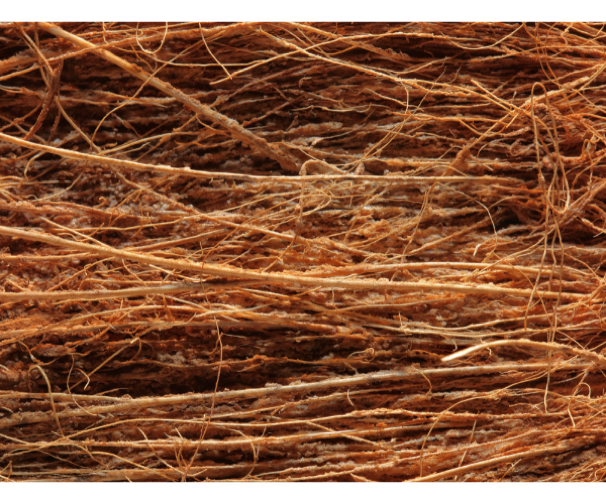
White fibers are comparatively more flexible but less strong because they come from the unripe coconuts. On the other hand, brown fibers are stiffer, highly durable, and greater in strength as they are harvested from ripe coconuts.
For hydroponic gardening, brown fiber is more suitable. It provides a firmer support medium and prevents the growth of unwanted organisms in hydroponic gardening uses.
Salt Content and pH
Lastly, you must choose high-quality coco coir products with low salt content. As already discussed, some manufacturers use saltwater during the soaking phase in the production process. Even if they have used freshwater, always rinse your coir thoroughly before using it.
Ideally, you should use a low EC solution to flush the product. You should keep rising until the water running through the product is clear, instead of brown or tan. Test this clear water for pH and EC before using the product.
Testing Coir for Hydroponic Use
pH and Electrical Conductivity(EC) are two critical areas to check in coconut coir products for hydroponic purposes. These metrics will determine how suitable your product is for gardening. Here's how you can test it yourself.

Rehydrate a coco coir block and take samples from different parts. Collect these samples so that they make up at least half a cup and put it into a bowl. Pour about six ounces of demineralized RO water and let the mixture soak for several hours.
- Stir the mixture thoroughly and measure pH.
- Strain coir and keep the water.
- Now measure the pH and EC of the water.
- The pH should be between 5.3-6.2.
- The EC should be between 1.0-1.3
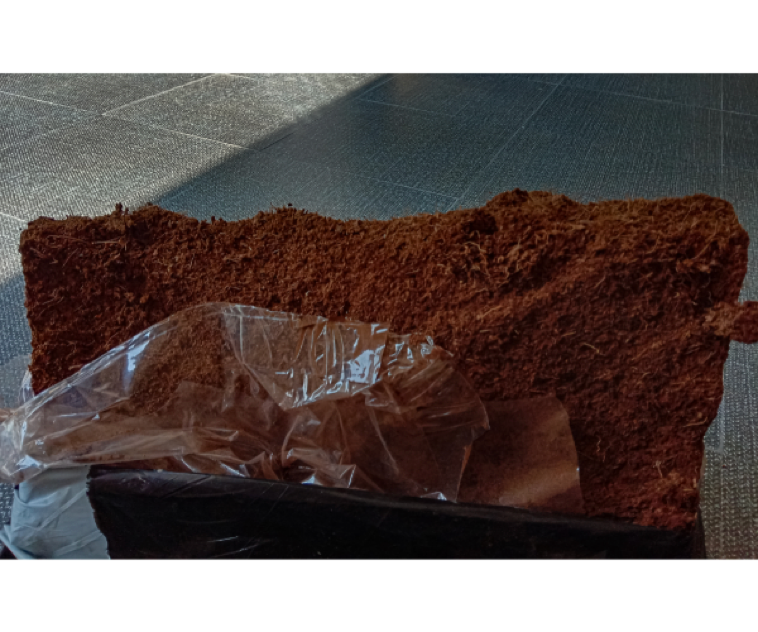
How to make a coco coir brick usable
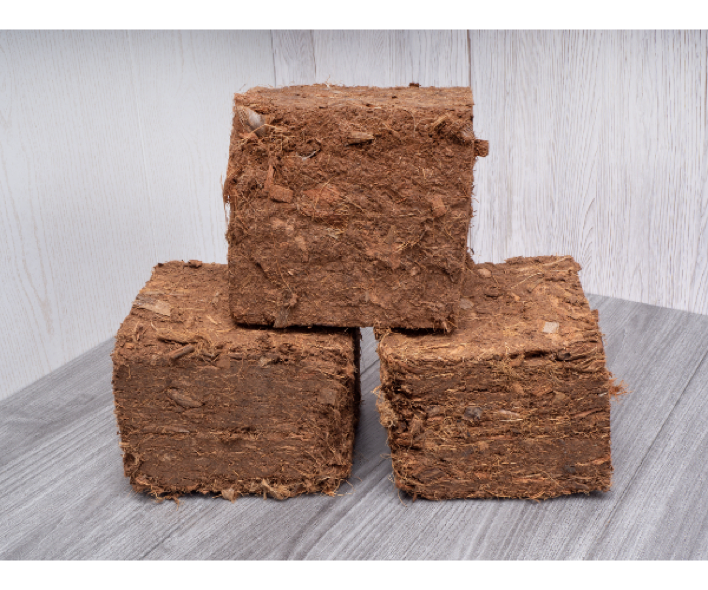
As you already know, coconut coir is commercially available in the form of dried and compressed bricks. This makes carrying and shipping really easy. However, bricks can not be used directly and should be soaked for some time. Let us see how to do that.
Steps To Rehydrate a Coir Brick
This simple and easy process starts with a wide, large, and watertight container. First, read the instructions on the packaging to know how much water you need to soak the brick. A coir brick can expand up to nine times its weight in water, so make sure that the container is wide and high enough to contain it. Place the brick in the container and pour the water.
After about half an hour, break up the wet parts to expose the inner layers of the brick that are still dry. Wait a few more minutes until the brick has soaked up the water. The final mix might seem like sludge. If you pour in more water than needed, the mix will have a runny consistency. If so, strain the excess water.
Finally, you have on your hands a well-soaked organic growing medium for your plants, gardens, or hydroponic setups.
Final Word
In this definitive guide, we have learned a great deal about coconut coir, its benefits, and how to use it in hydroponics.
But the question is, is that all there is to know?
Certainly not. While coconut coir is easy and simple to work with, there are still many variables that can impact your gardening goals negatively.
To avoid such a fate, it is better to rely on an expert who can recommend the best solutions and products specifically designed for your needs. Humboldt Secret Supplies is a goldmine for amateur or pros alike who want a no-hassle nutrient solution when working with coconut coir. They have a vast range of products that can complement and speed up your gardening goals and take a lot of worry, strain, and stress off your shoulders.
1 comment
I like to say thanks 😊 for the information it was really helpful